Inflatable Oxford Cloth Camping Tent: Setup & Stability Guide
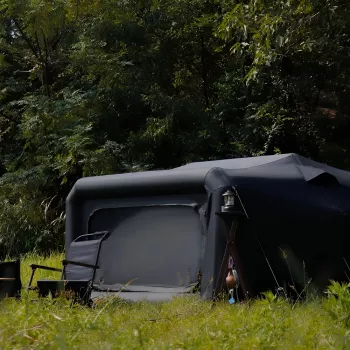
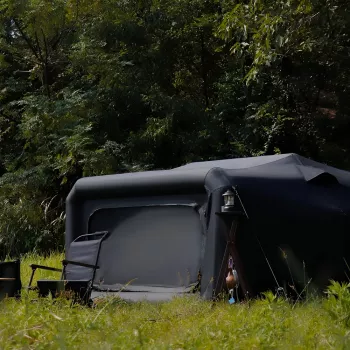
An inflatable tent built with Oxford cloth is designed for campers who value a fast, repeatable pitch, a stable structure, and fabric that can take frequent packing and weekend use. Instead of juggling multiple pole segments, you inflate air beams to create the tent’s frame, then lock in stability with stakes and guylines. Below is a practical guide to how inflatable framing works, what Oxford cloth contributes outdoors, and the checks that matter before heading out.
What Makes an Inflatable Tent Different
Inflatable tents replace (or supplement) traditional poles with air beams—reinforced tubes that become rigid once pressurized. The big benefit is simplicity: fewer loose parts to misplace and fewer assembly steps when you arrive late, the wind is picking up, or you’re setting up by headlamp.
Because the structure depends on correct inflation pressure, a reliable pump and well-designed valves matter as much as fabric toughness. Once beams are inflated to the recommended firmness, stability comes from the full system: solid staking, properly tensioned guylines, and choosing a sensible site. For punctures, the best approach is preparation—carry patches, know where your valve tool is (if applicable), and practice one basic repair at home so it’s not a first-time learning moment in the rain.
Oxford Cloth Performance in the Outdoors
Oxford cloth is a woven fabric known for abrasion resistance and a sturdy hand-feel. For camping use, that translates into a tent body that’s comfortable to handle repeatedly—packing, unrolling, and tensioning—without feeling overly delicate. It’s also a good match for campers who want a more “base-camp” feel, where the tent is used as a dependable hub rather than a minimalist shelter.
When comparing Oxford cloth tents, focus on build details that directly affect long-term performance: tight stitching, reinforcement at stress points (corners, door edges, guy-out loops), and seams that are taped or otherwise well-finished to reduce water entry. A durable floor and a well-formed bathtub edge help keep splashback and runoff from creeping inside, especially if water begins moving across the ground during a heavy shower.
Condensation is less about fabric type and more about ventilation design and how you pitch the tent. Prioritize vents and mesh panels, and look for a rainfly layout that promotes airflow while still covering mesh areas exposed to wind-driven rain.
Setup and Takedown: A Practical Routine
Setup essentials
Start with site selection. Choose level ground, avoid depressions where water can pool, and clear sharp debris that can damage the floor. If you’re staying more than a night, it’s worth taking an extra minute to aim the tent so the lowest profile faces the prevailing wind.
For inflation, lay the tent out flat, stake key corners to prevent shifting, connect the pump, and inflate the beams to the recommended firmness. After inflation, go back and tension guylines evenly—this step is what turns a merely “standing” inflatable tent into a shelter that resists gusts and flapping.
Wind handling and takedown
In wind, use every guy-out point available. Inflatable beams can be very stable when fully inflated, but loose guylines are a common failure point because they allow the structure to move and load the seams unevenly.
For takedown, wipe moisture where you can. Partially deflate first so the fabric relaxes, fold neatly to avoid hard creases near seams and valves, then fully deflate and pack. This habit helps protect coatings, reduces valve stress, and makes your next pitch faster because everything comes out organized.
Keep a small repair kit in the tent bag (patches, a small towel, and any valve tool the tent requires). A quick leak check and patch job can turn a trip-saving fix into a 10-minute routine.
Space, Comfort, and Livability
Comfort comes down to how the tent works during normal camp life—entering and exiting, changing clothes, storing gear, and managing airflow during sleep.
Weather Readiness and Stability Checks
Cold nights: Expect more condensation. Increase ventilation slightly, keep wet items in a vestibule, and avoid drying soaked layers inside your sleeping area. For cold-weather safety guidance, review the CDC’s recommendations on preventing hypothermia and frostbite.
Storm awareness: Monitor forecasts and avoid exposed ridgelines. The National Weather Service has a helpful hub for weather safety when planning outdoor trips.
Care, Cleaning, and Long-Term Storage
When camping, it also helps to follow the Leave No Trace Seven Principles to reduce impact and keep campsites in good condition for future trips.
Quick Reference: What to Confirm Before the First Trip
| Checklist Item | Why It Matters | Quick Test |
|---|---|---|
| Valve seal | Prevents slow leaks overnight | Inflate and listen/feel for escaping air |
| Guyline points | Improves wind stability | Stake out all points and shake-test |
| Floor condition | Reduces puncture risk | Inspect underside and corners for abrasion |
| Vent layout | Lowers condensation | Confirm vents can stay open under the fly |
In-Stock Picks
- Inflatable Oxford Cloth Camping Tent
- Golf Cart Bag with 14-Way Divider
- 3-Level Modern Cat Tree with Scratching Pad, Cushions, Condo and Toy
FAQ
How long does an inflatable camping tent take to set up?
Most setups land around 5–15 minutes once you know the routine, including staking, inflation, and guylines. The first pitch often takes longer, and strong wind can add time because careful staking and re-tensioning become more important.
What happens if an air beam gets a puncture?
Small punctures are often patchable in the field: locate the leak, apply the patch per the kit instructions, and re-inflate to firmness. Keeping guylines properly tensioned also helps maintain stability while you troubleshoot or after a temporary repair.
Is Oxford cloth suitable for rainy camping trips?
Yes, Oxford cloth can perform well in rain when paired with strong seam protection, a full-coverage rainfly, and a bathtub-style floor. Good pitching habits—level site choice, correct tensioning, and avoiding pooling—make a major difference in staying dry.







Leave a comment